Uploading Assets
Written By Philipp Brockerhoff
Last updated About 1 hour ago
Use the Art Manager to upload custom artwork and turn it into Assets that can be used in the Inkarnate editor. You can upload individual files or multiple files at once, assign them to a Style and Pack, and configure their names and Tags before completing the upload.
Basic Asset types such as Stamps and Textures are created by uploading image files. Stamp Sets and Stroke Assets are created from existing Assets and use separate creation workflows.
Tip
For Stamp Assets, PNG is usually the best choice because it supports transparency. For Texture Assets without transparency.
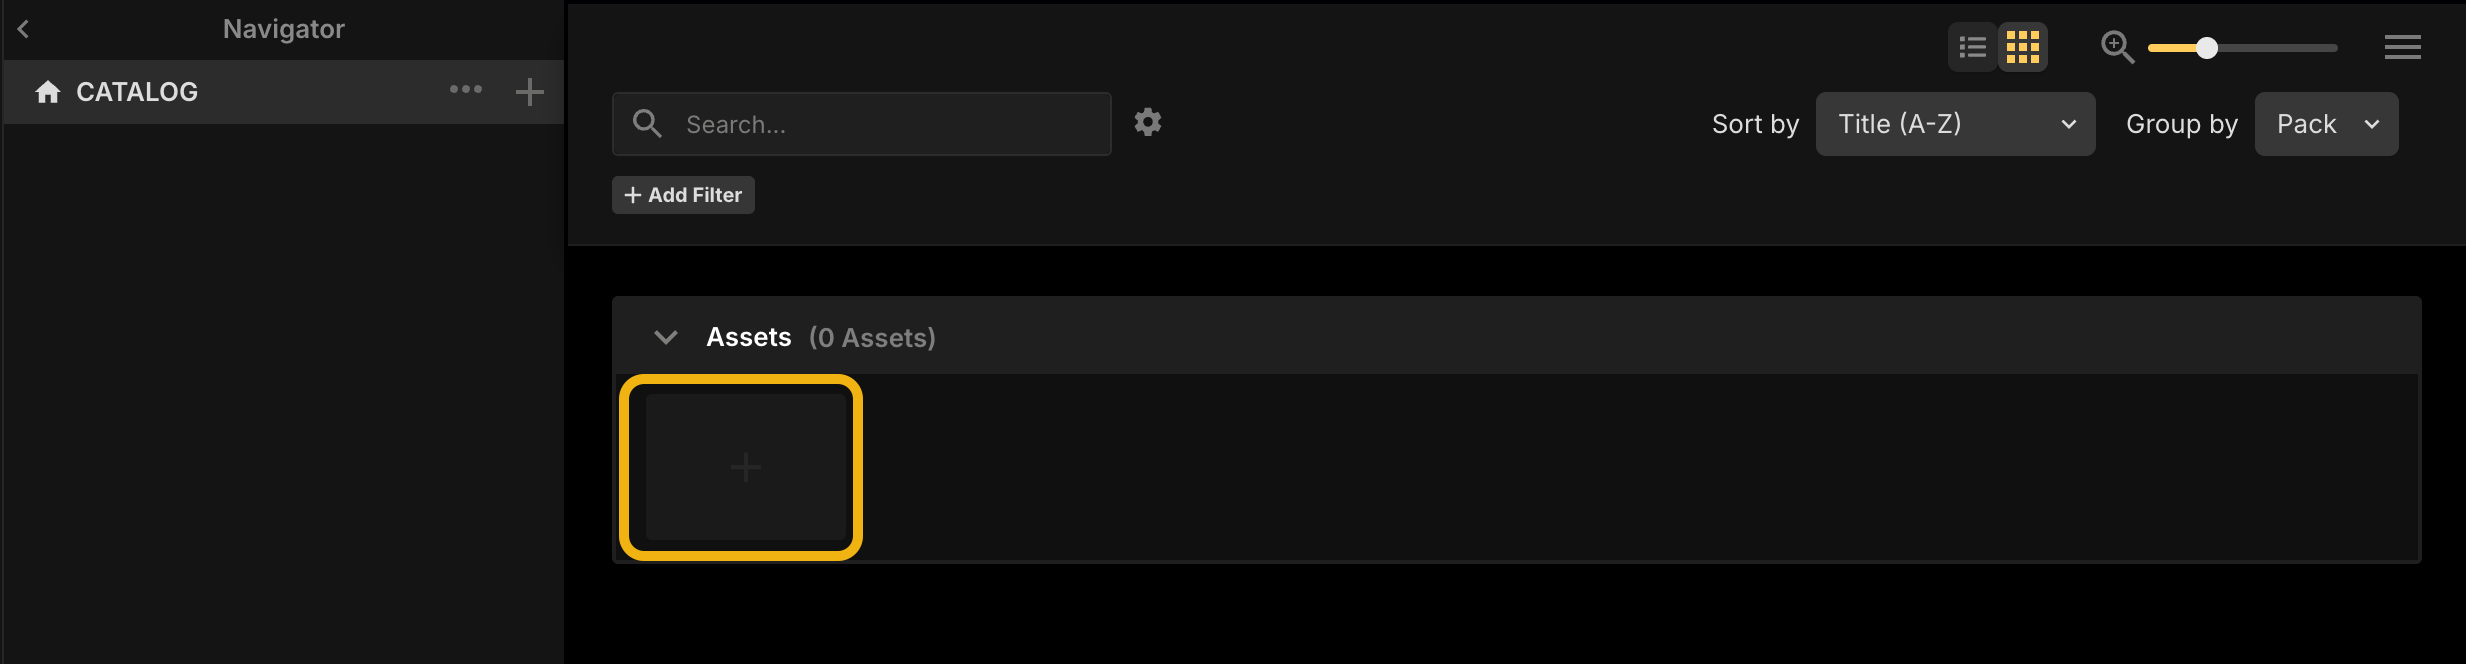
You can also upload Stamps and Textures directly from the Catalog while working in the editor. Assets uploaded this way are added to the Assets section and cannot be assigned directly to a Pack during upload. More complex Asset types, such as Stroke Assets, need to be created and managed through the Art Manager.
Opening the Upload Dialog
You can begin an upload from several locations in the Art Manager:
Click the Add Asset from the Asset View.
Select Add Asset from a Pack in the Hierarchy Panel.
The selected location may be used as the initial destination for the uploaded Assets.
Uploading Files
You can upload multiple files at once, but folders cannot be uploaded directly. To upload Assets:
Open the upload dialog.
Select the type of Asset you want to upload.
Add one or more image files.
Choose the destination Style and Pack.
Review the extracted names, Tags, and file associations.
Submit the upload.
Each uploaded file creates a separate Asset unless it is identified as a supporting file through filename metadata.
Choosing a Style and Pack
During upload, you can assign the new Assets to an existing Style and Pack.
You can also create a new Style or Pack directly from the upload dialog when the required destination does not already exist.
Assets uploaded without a Pack are placed in the Assets section directly under the catalog. They can be moved into a Pack later.
File Requirements
The upload dialog displays the supported file formats and the maximum image dimensions and file size for the selected Asset type.
Each file must have a unique filename within your account, regardless of which Style or Pack contains the resulting Asset.
Supported formats: PNG, JPG, JPEG, WebP
Maximum size: 30 MB
Maximum dimensions: 16,384 × 16,384 pixels.
Allow Updates
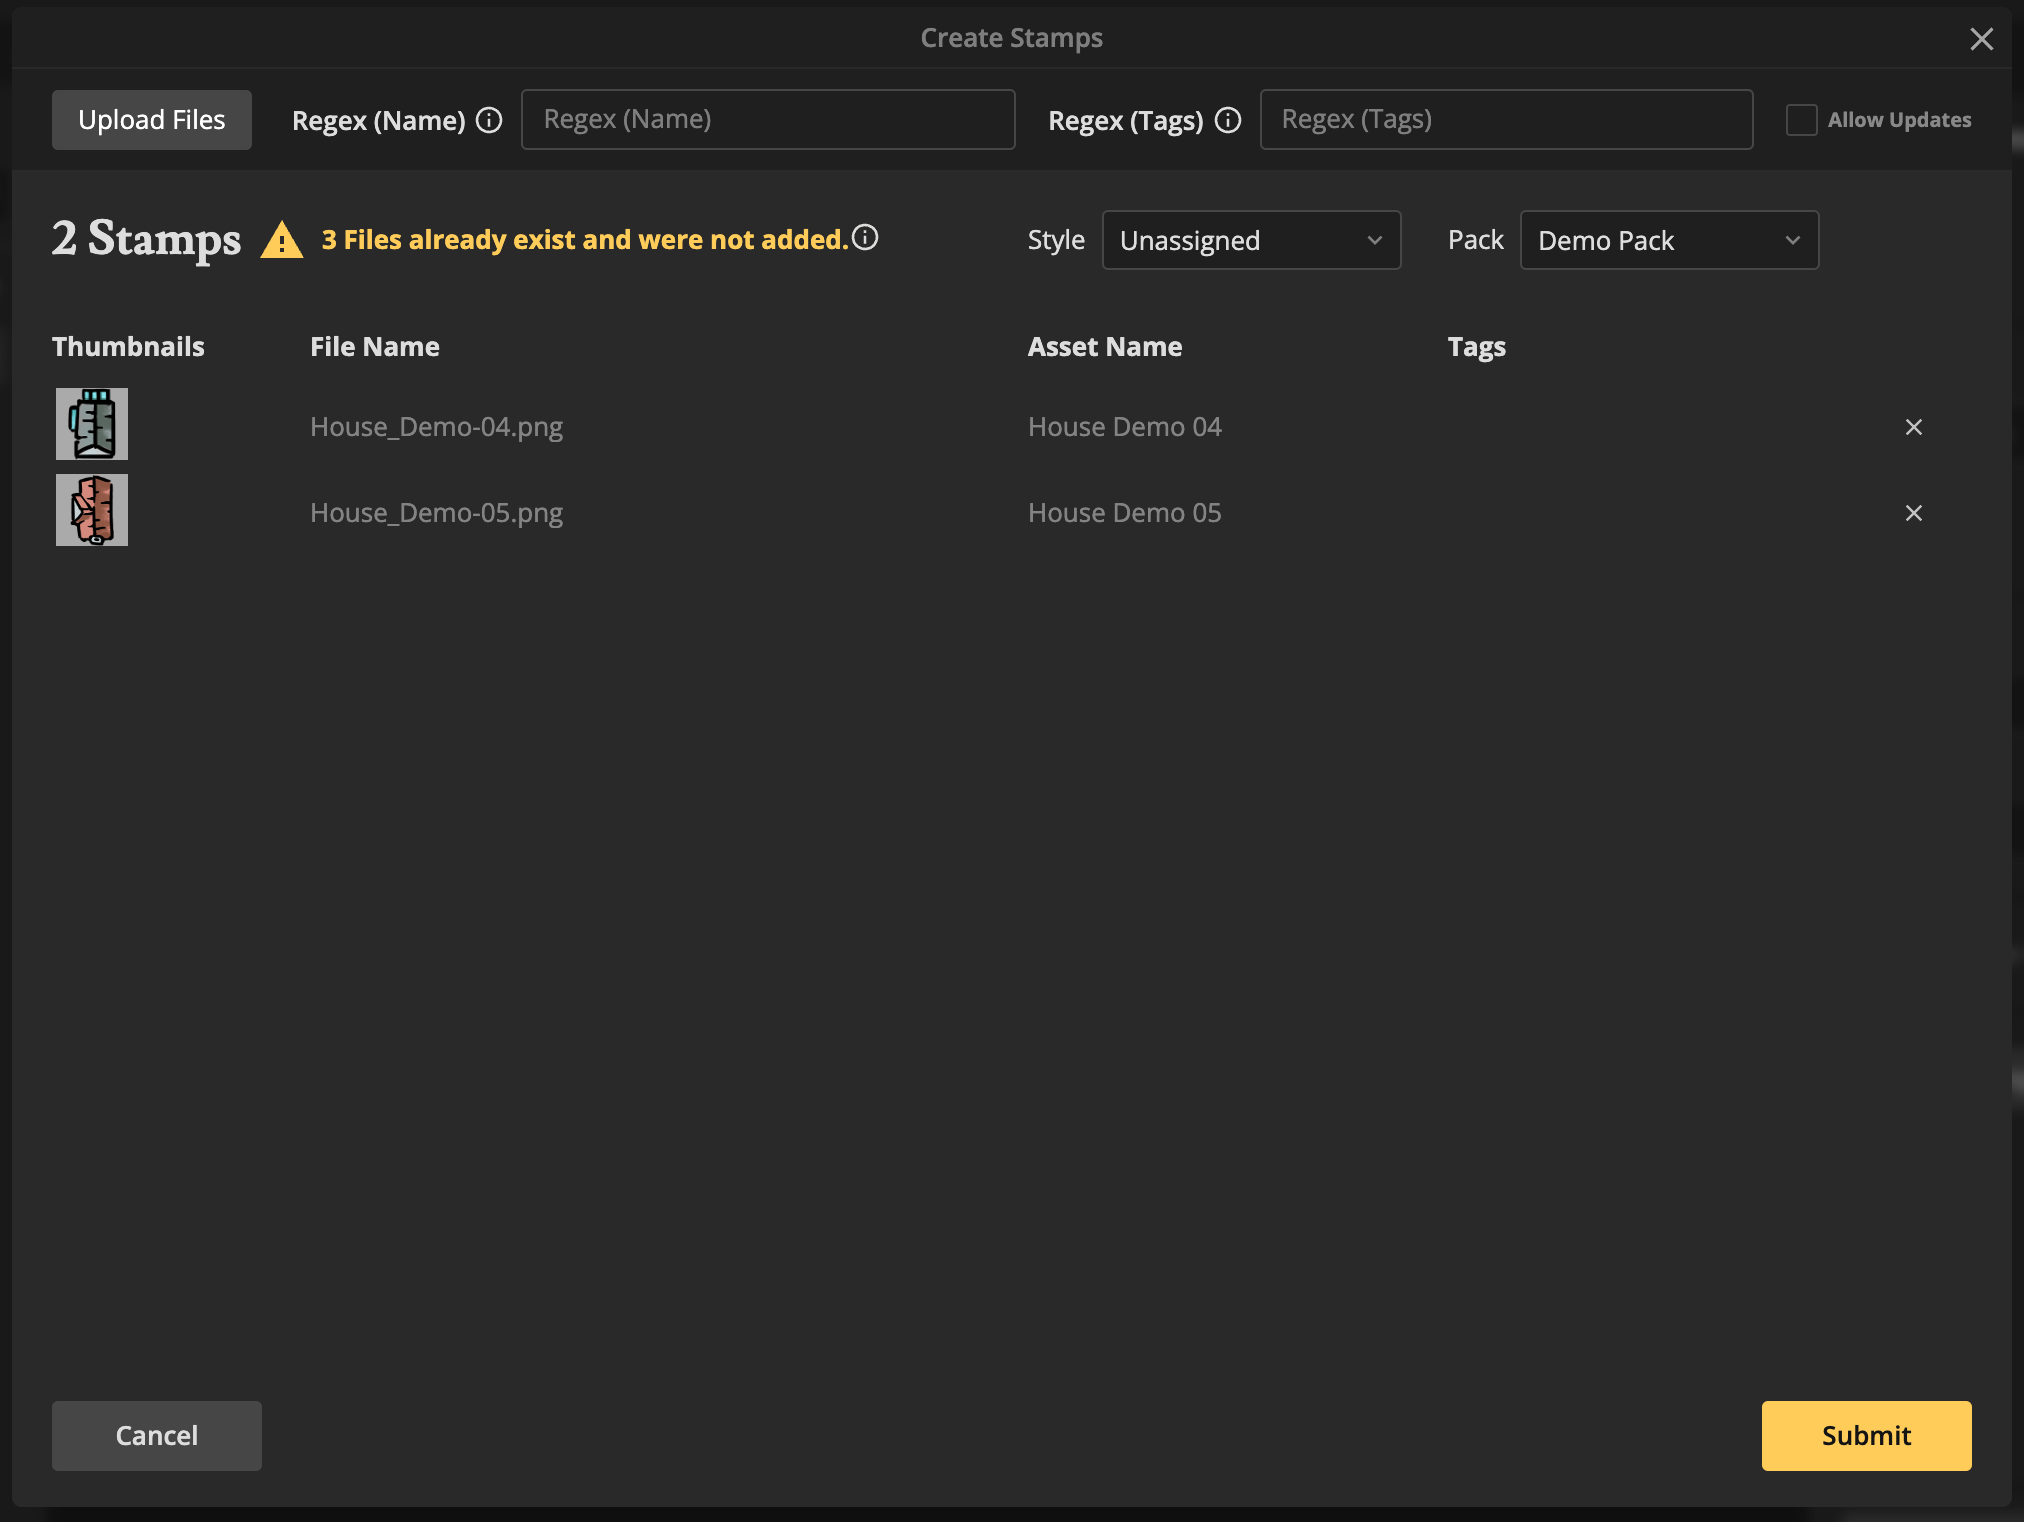
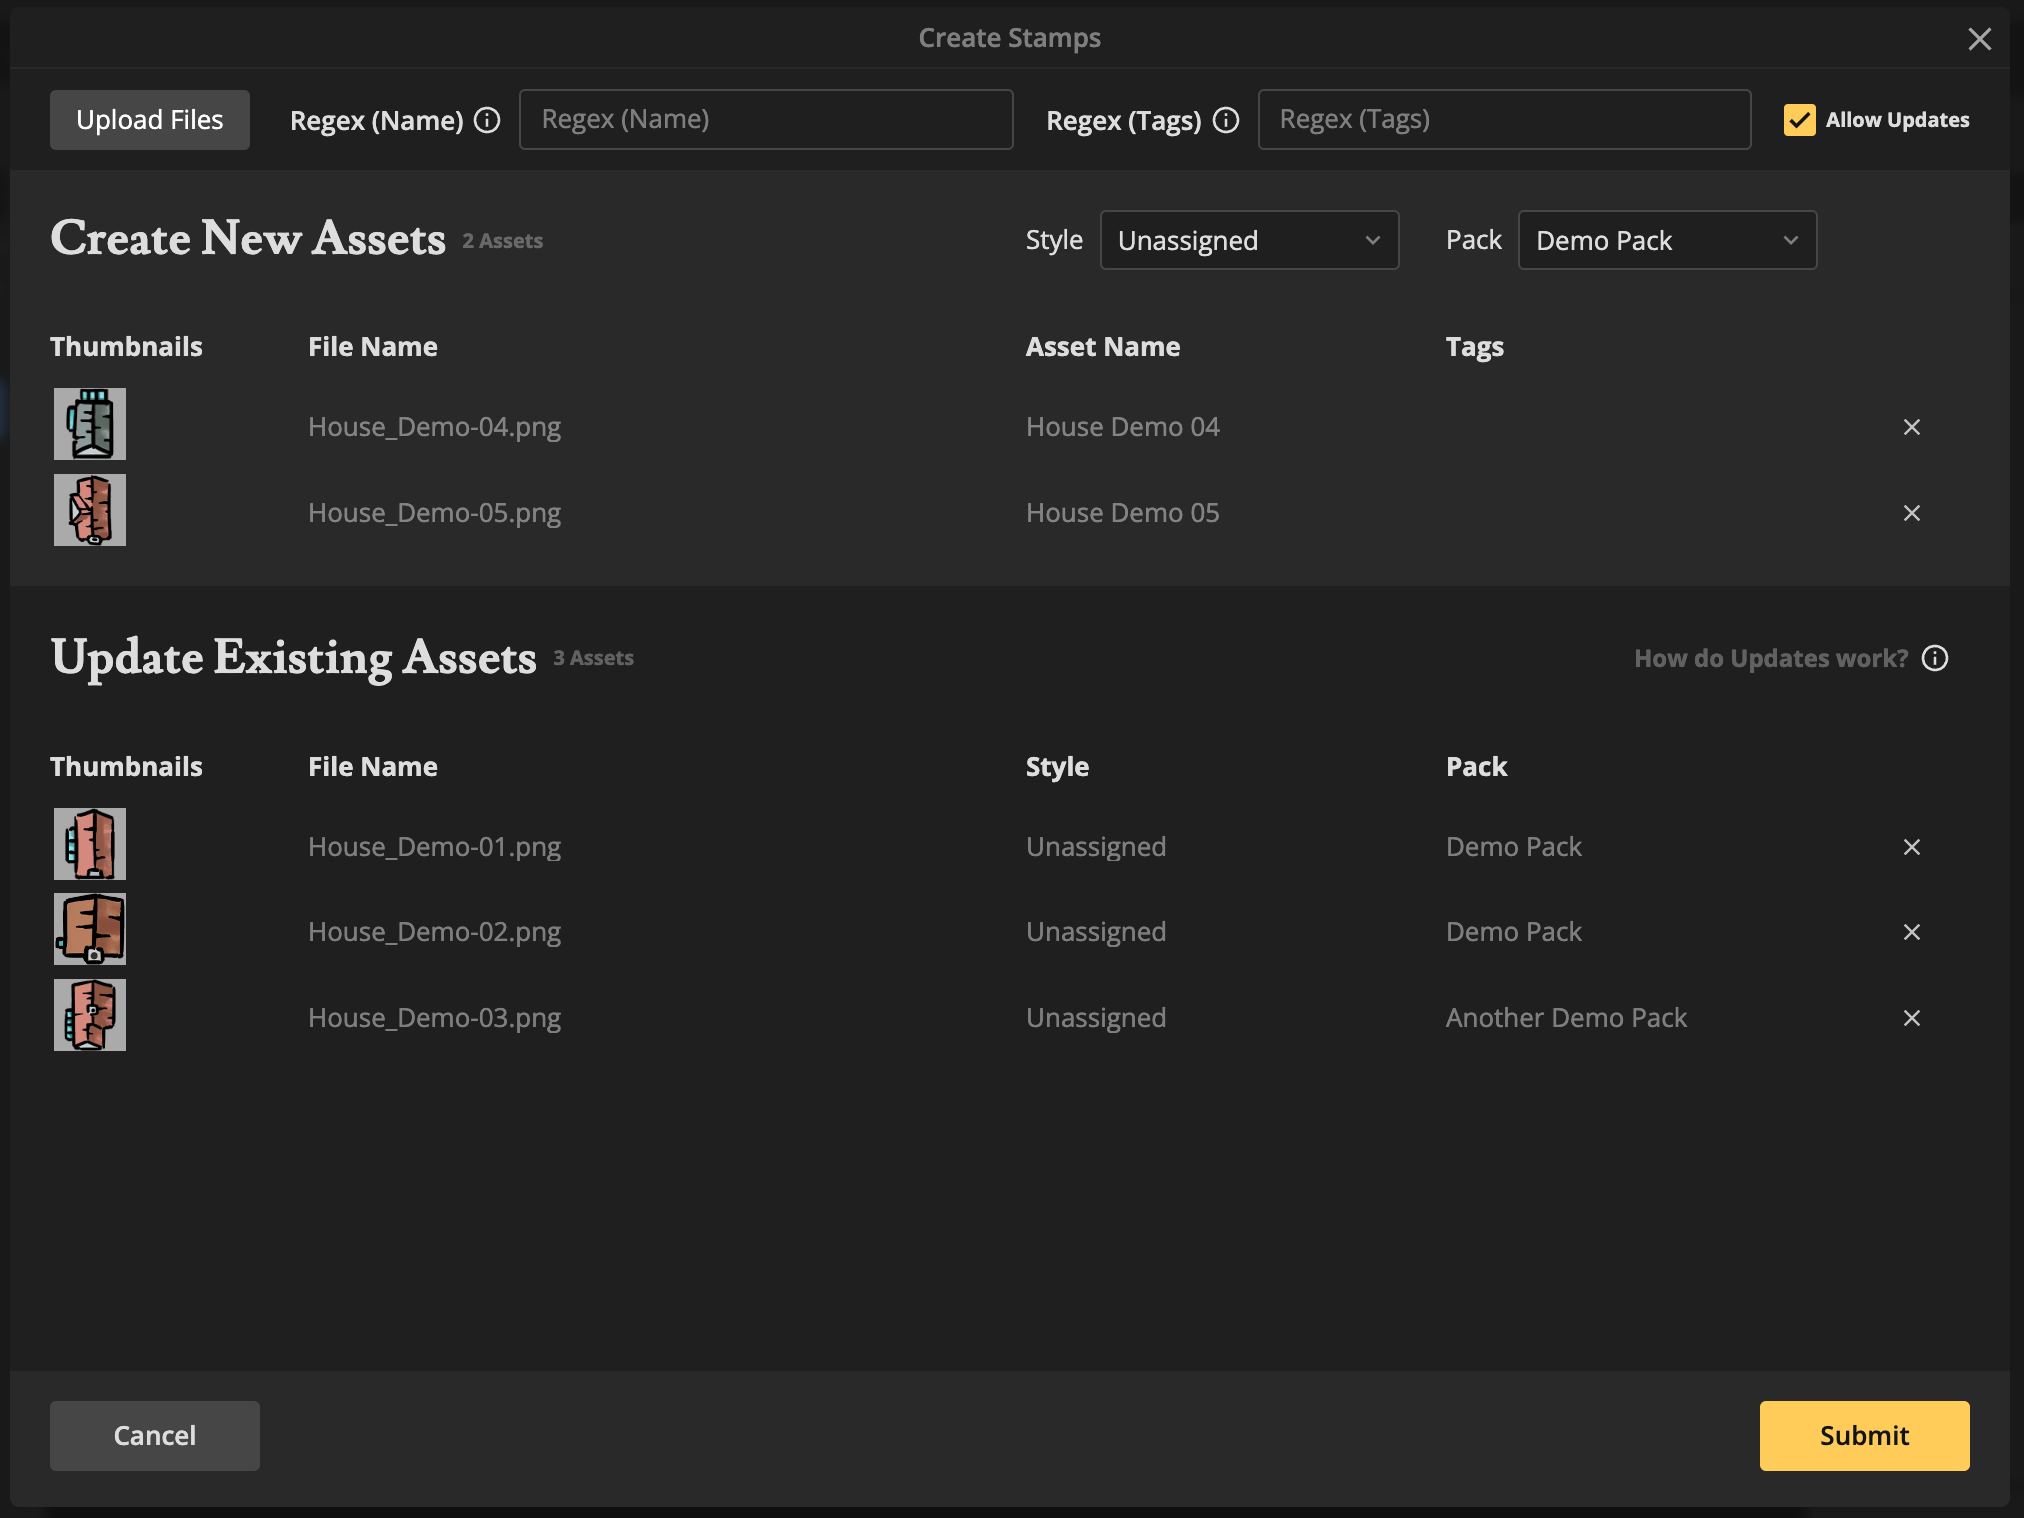
Allow Updates controls how duplicate filenames are handled during upload. If no Asset with the same filename exists, a new Asset is created. If a matching Asset is found, enabling Allow Updates updates the existing Asset, while disabling it ignores the file and reports it in the upload dialog.
Updating an Asset preserves its existing configuration, including its name, Tags, Pack, and Style assignment. The previous version is internally archived and replaced with the new one (See Archive & Delete).
The Allow Updates setting is remembered between upload sessions.
Note: Assets are matched by their filename, not their display name. After uploading, you can change an Asset’s display name by selecting the Asset and editing its name in the Details Panel on the right. Changing the display name does not affect future updates.
Asset Names
By default, the Asset name is generated from the filename. The file extension is removed and underscores are converted into spaces.
Example:
Filename:
House_Demo-01.pngAutogenerated Asset Name:
House Demo-01
You can review and change the generated name before completing the upload. Asset names are displayed in the Catalog and can be used to find the Asset through search. For predictable results, use clear and descriptive filenames before uploading your files.
Filename Metadata
Filename metadata can automatically assign names, Tags, and file roles during upload. Metadata is added inside square brackets in the filename and is removed from the stored Asset filename after processing.
Multiple metadata entries can be combined in a single filename by adding multiple metadata blocks.
Names
Use [name=...] to define the Asset name.
For example:
castle[name=Ruined Castle].png The uploaded Asset is named Ruined Castle.
Tags
Use [tags=...] to assign one or more Tags.
For example:
castle[tags=ruin,stone,fortress].png Each listed value is matched against the official Tags and their keywords. If it matches an official Tag, that Tag is applied as a Public Tag. If it matches a keyword, the corresponding official Tag is applied. If no match is found, the value is added as a Private Tag, which is only visible to the Asset owner.
Clip Mask Files
Clip Mask (see Clip Mask) metadata allows the Art Manager to recognize the corrsponding mask during upload instead of creating it as an independent Stamp.
Add [cm] to the end of a filename to identify it as the Clip Mask for a Stamp uploaded in the same batch. The remaining filename must match the Stamp filename.
Example:
mountain.png mountain[cm].png Stroke and Cap Files
Stroke Assets are composed of multiple Assets. Use the following filename metadata to automatically create and associate the required Assets during upload. (See Stroke Assets for more information.)
Add
[stroke]to identify an image as a Stroke Stamp. This automatically creates a Stroke Asset using that Stamp.Optionally, upload an additional image with the same filename and the
[cap]metadata to automatically assign it as the Cap Stamp.After processing,
[stroke]and[cap]are replaced with_strokeand_capin the stored filenames to keep them unique.
Example:
stonewall[stroke].png stonewall[cap].png Tips
Use a consistent filename prefix for each Style or Pack to keep Assets organized and simplify future updates.
Use filename metadata when uploading large batches to reduce manual editing.
See Also
Art Manager Overview: Understand the Art Manager layout and how Styles, Packs, and Assets are organized.
Styles: Group Packs that share a common visual style, scale, and scene behavior.
Packs: Organize related Assets into collections.
Tags: Categorize Assets and improve their Catalog search results.
Updating Assets: Replace existing Asset files while preserving their configuration.
Stamp Sets: Combine related Stamps into a single Asset with multiple Child Stamps.
Stroke Assets: Create colored or image-based strokes for the Line & Shape Tool.
Was this helpful?
Still need help? Ask the team