Object Layer
Written By Philipp Brockerhoff
Last updated About 2 hours ago
An Object Layer stores object-based elements on your map, including stamps, text, lines, shapes, and groups. Objects are individual elements that can be selected, moved, rotated, scaled, and otherwise edited independently. Use Object Layers to organize objects, control their rendering order, and apply shared layer settings such as shadows, blend modes, and clip mask behavior.
Layer Options
Object Layers provide several settings that affect every object on the layer.
Opacity: Adjusts the transparency of all objects on the layer.
Blend Mode: Controls how the entire layer blends with the layers beneath it. When a layer blend mode other than Normal is selected, individual object blend modes are disabled. See Blend Modes for more information.
Layer Shadow: Applies a shared shadow to every object on the layer that has Layer Shadow selected. See Shadow Options for more information.
Clip Mode: Controls how Clip Masks behave for objects on the layer. See Clip Masks for more information.
Sublayers
Each Object Layer contains 21 sublayers, ranging from 10 to -10.
Sublayers are configured through the Layer Options of an Object Layer. Open the Layer Options by clicking the gear icon next to the layer or by right-clicking the layer and selecting Layer Options.
Sublayers provide an additional level of organization and control the rendering order of objects within the layer. Objects on higher sublayers are always rendered above objects on lower sublayers.
Each sublayer can also be:
Hidden to temporarily hide all objects on the sublayer.
Locked to prevent objects on the sublayer from being selected on the canvas. Locked objects remain selectable from the Object Panel.
Object Ordering
Every scene style uses one of two object ordering methods. When a new map is created, it automatically adopts the ordering method of the selected scene style. This cannot be changed later, and the same ordering method is used for all Object Layers and objects in the map, even when using assets from multiple scene styles.
The selected ordering method determines how objects are rendered within each sublayer.
Top-Down Ordering
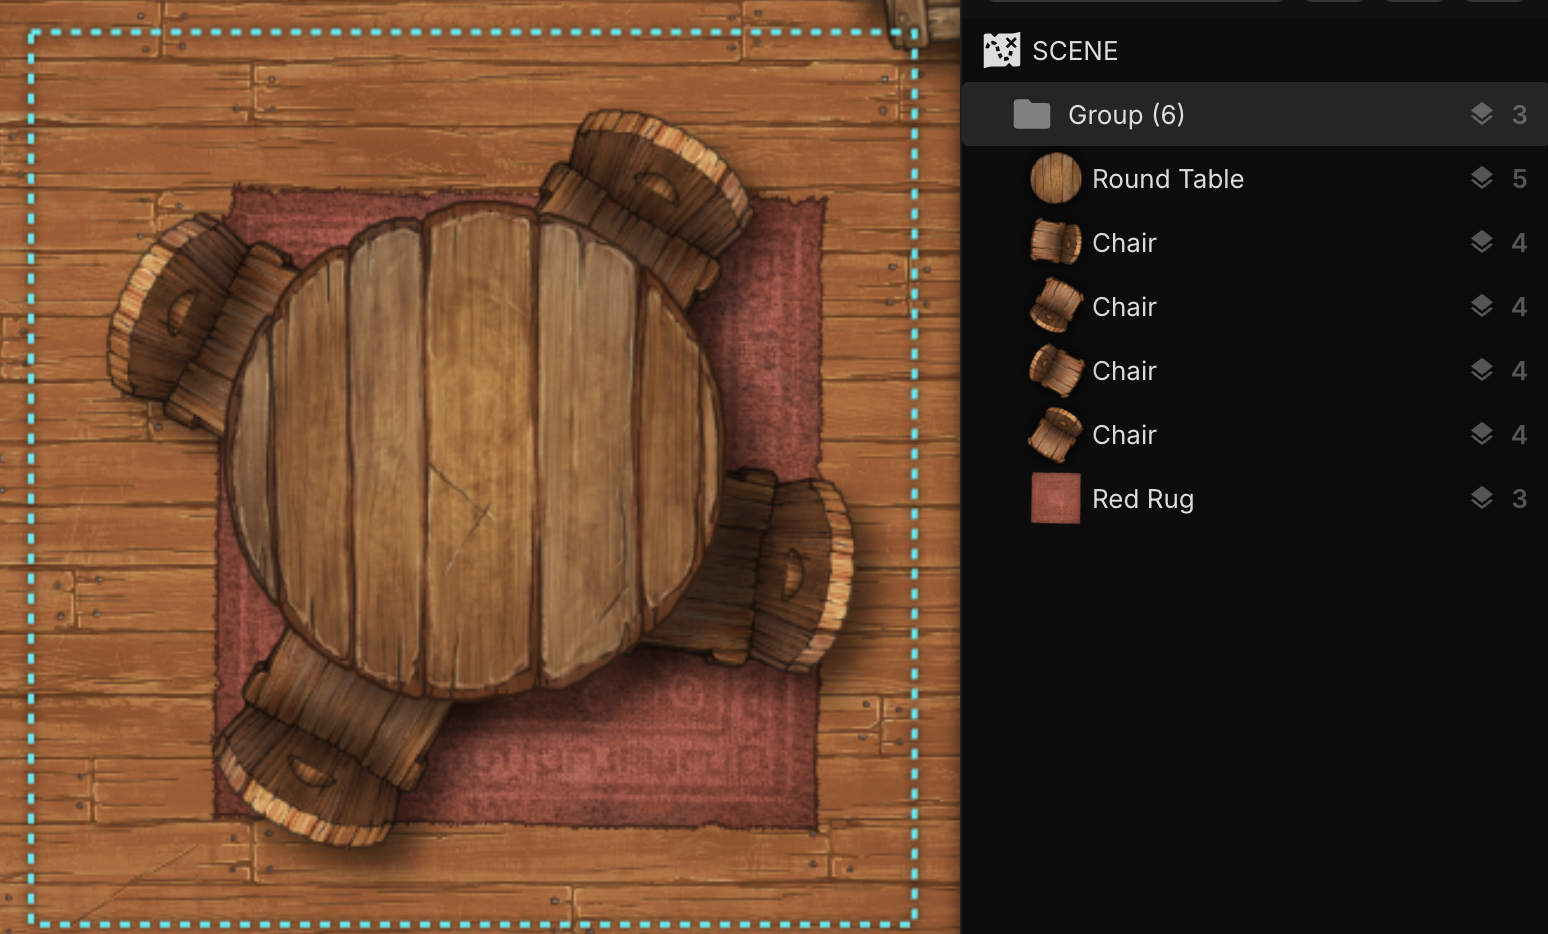
Top-Down Ordering renders objects based on their placement order. By default, the newest object is rendered on top of older objects. The Object Panel displays this order, and you can change it at any time by dragging objects up or down in the list.
This ordering mode is used by the following styles:
Fantasy Battlemaps
Watercolor Battlemaps
Battlemaps Classic
Sci-Fi Battlemaps
Watercolor Cities
Isometric Ordering
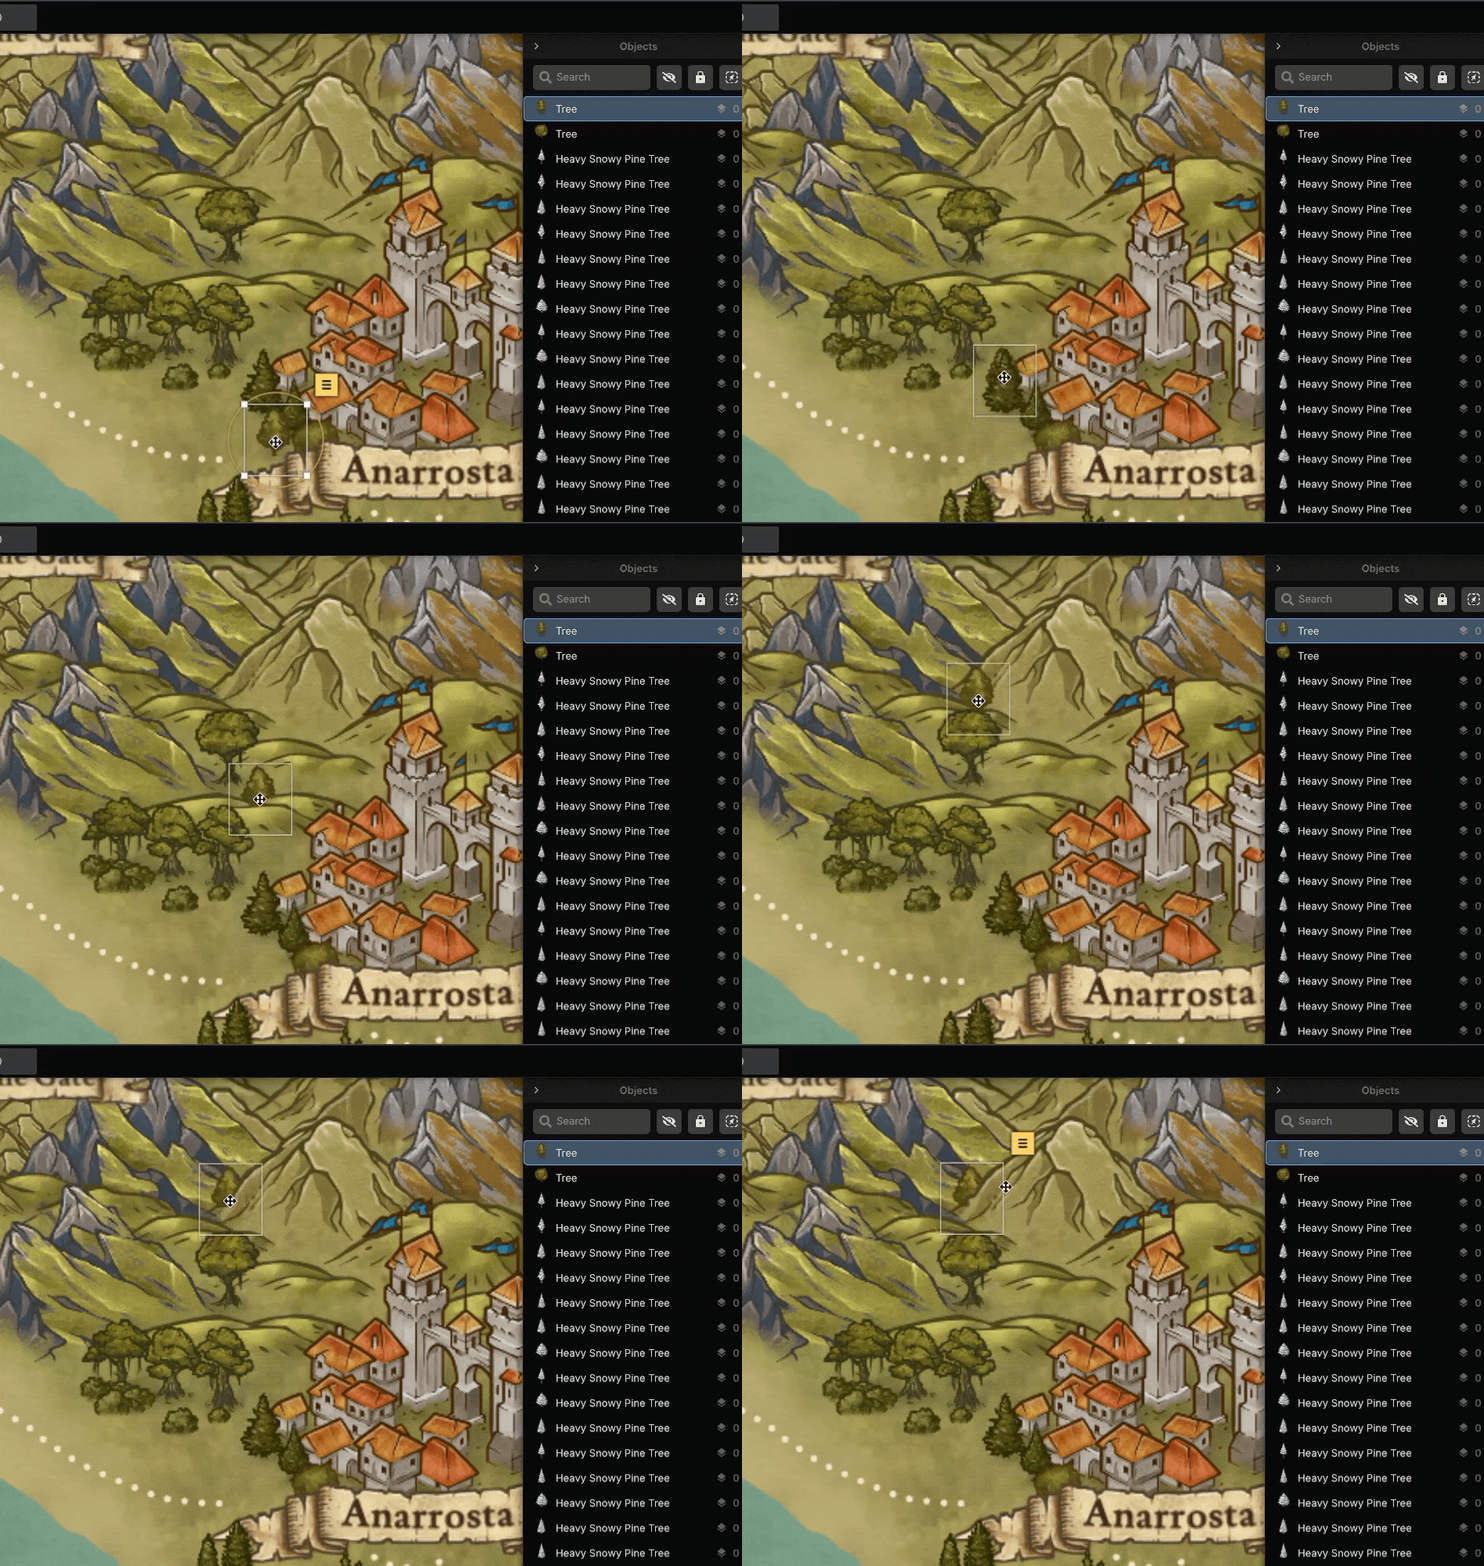
Isometric Ordering automatically determines the rendering order based on each object’s anchor point, creating the illusion of depth.
Objects with an anchor point higher on the map are rendered behind objects with a lower anchor point. Most assets use their center as the anchor point, although some assets use a customized anchor position to produce more natural results.
This ordering mode is used by the following styles:
Fantasy World
Fantasy Regional
Parchment World
Tips
Use separate Object Layers for different categories of objects, such as terrain, buildings, and labels.
Use Sublayers to control broad rendering order, and Object Ordering to control the order within each sublayer.
In top-down styles, use the Object Panel to manually adjust overlapping objects.
The Select Tool only selects objects on the active Object Layer. If you can’t select an object, verify that the correct Object Layer is active.
See Also
Layers Panel: Create and manage all layer types.
Object Panel: Select, organize, and reorder objects within an Object Layer.
Shadow Options: Configure shared Layer Shadows.
Clip Masks: Learn how Clip Mask Modes affect objects on the layer.
Stamp Tool: Place and customize assets on your map.
Text Tool: Add text objects to Object Layers.
Line & Shape Tools: Create node based objects with clip strokes and fills.
Was this helpful?
Still need help? Ask the team