Clip Masks
Written By Philipp Brockerhoff
Last updated About 2 hours ago
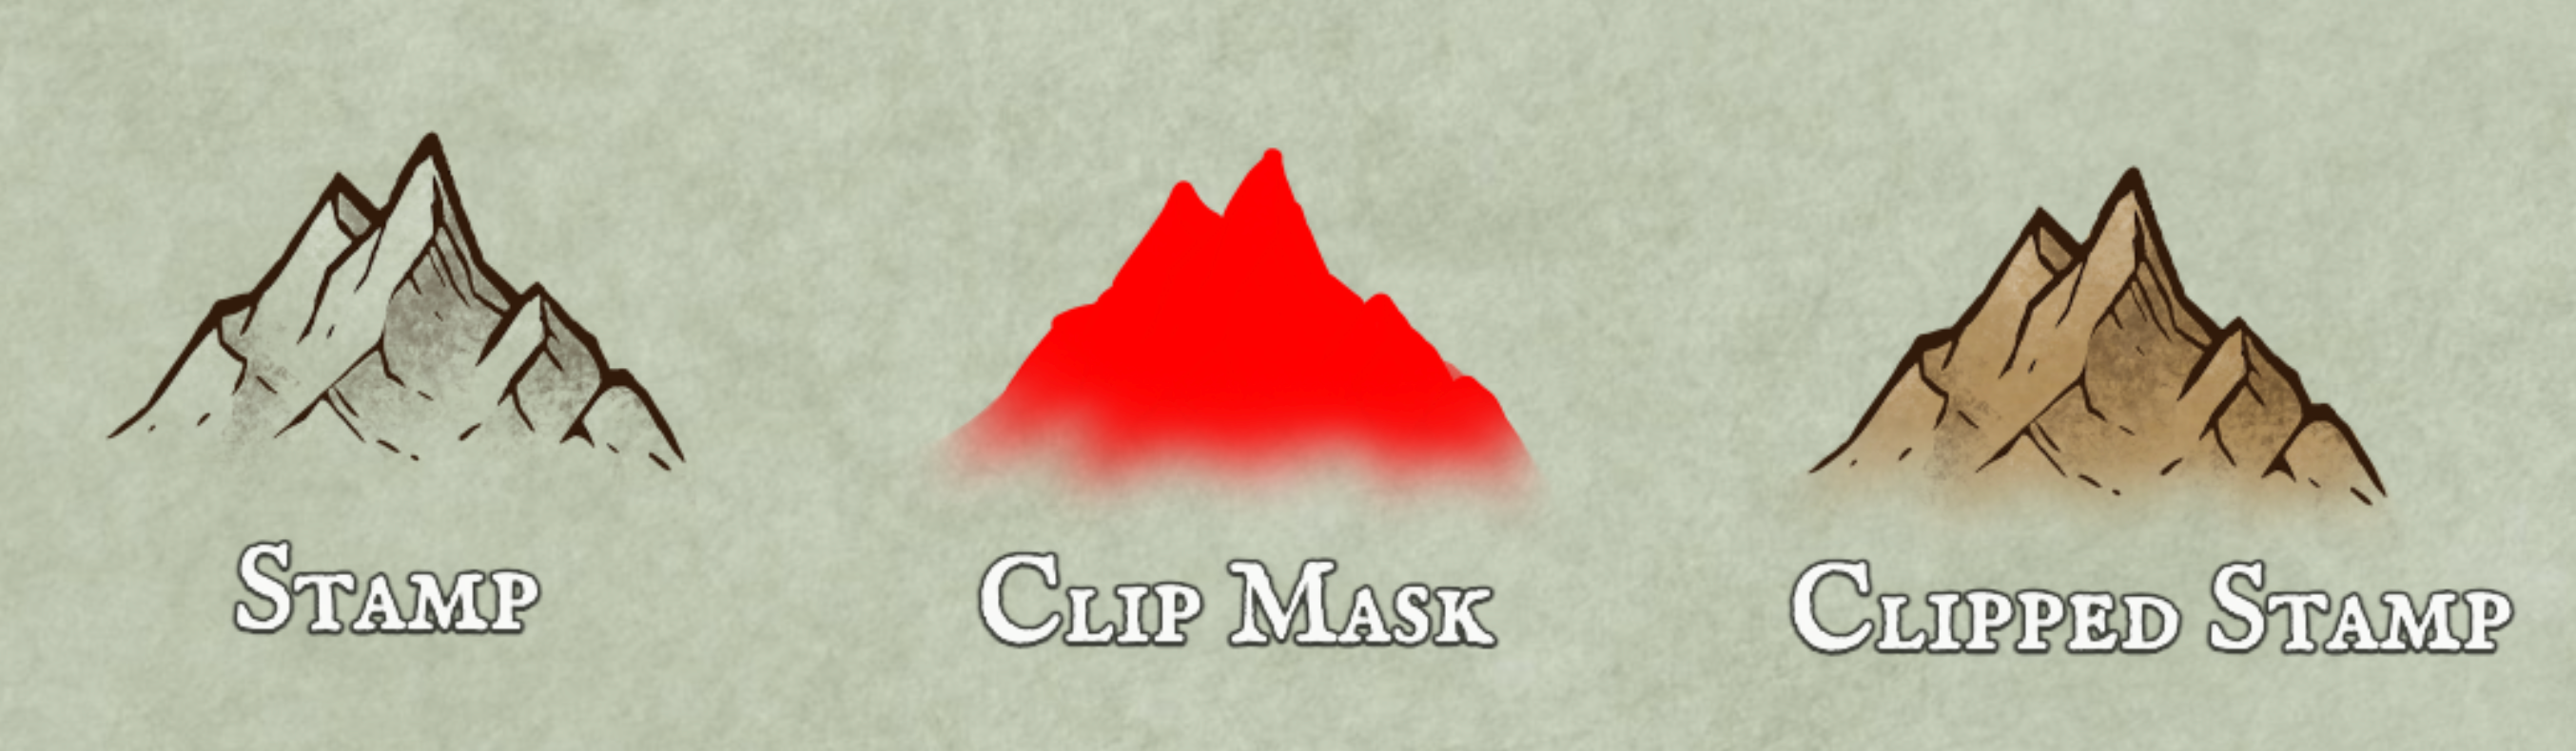
Clip Masks allow objects, strokes, and fills to blend seamlessly with the surrounding terrain by displaying the underlying brush texture of the nearest brush layer within selected parts of the asset, effectively clipping out any underlying objects that would otherwise show through transparent areas of an asset. Clip Masks are commonly used to adapt assets to different terrain textures, blend objects naturally into the landscape, and create seamless transitions between land and water.
Clip Masks are available in the Stamp Tool and the Line & Shape Tools.
How Clip Masks Work
Normally, stamps, strokes, and fills are rendered using only their own asset. When a Clip Mask is enabled, the texture from the nearest Brush Layer beneath the current Object Layer is rendered directly behind the clipped areas of the asset.
The Clip Mask determines where this underlying texture is shown, while the rest of the asset is rendered normally.
Clip Mode
The Clip Mode determines what is displayed inside the clipped areas of an object. It is configured on the Object Layer and applies to all clip-masked objects on that layer.
The following modes are available:
Brush Layer Below: Displays the texture from the nearest Brush Layer beneath the current Object Layer. This is the standard mode used by world and regional map styles.
Erase: Prevents objects on the same Object Layer that are rendered below the clip-masked object from appearing within the clipped areas. Objects rendered above it remain visible.
See Object Layers for more information about configuring Clip Mask Modes.
Common Uses
Clip Masks are used throughout Inkarnate to help objects integrate naturally into the map.
Terrain Blending
Many assets contain areas that use a Clip Mask instead of a fixed texture. This allows the asset to automatically adopt the surrounding terrain texture, making it blend naturally into grass, sand, snow, or other environments.
Coastlines and Water
In most world map styles, land is created using a Land Layer, while water textures are painted on a Brush Layer beneath it.
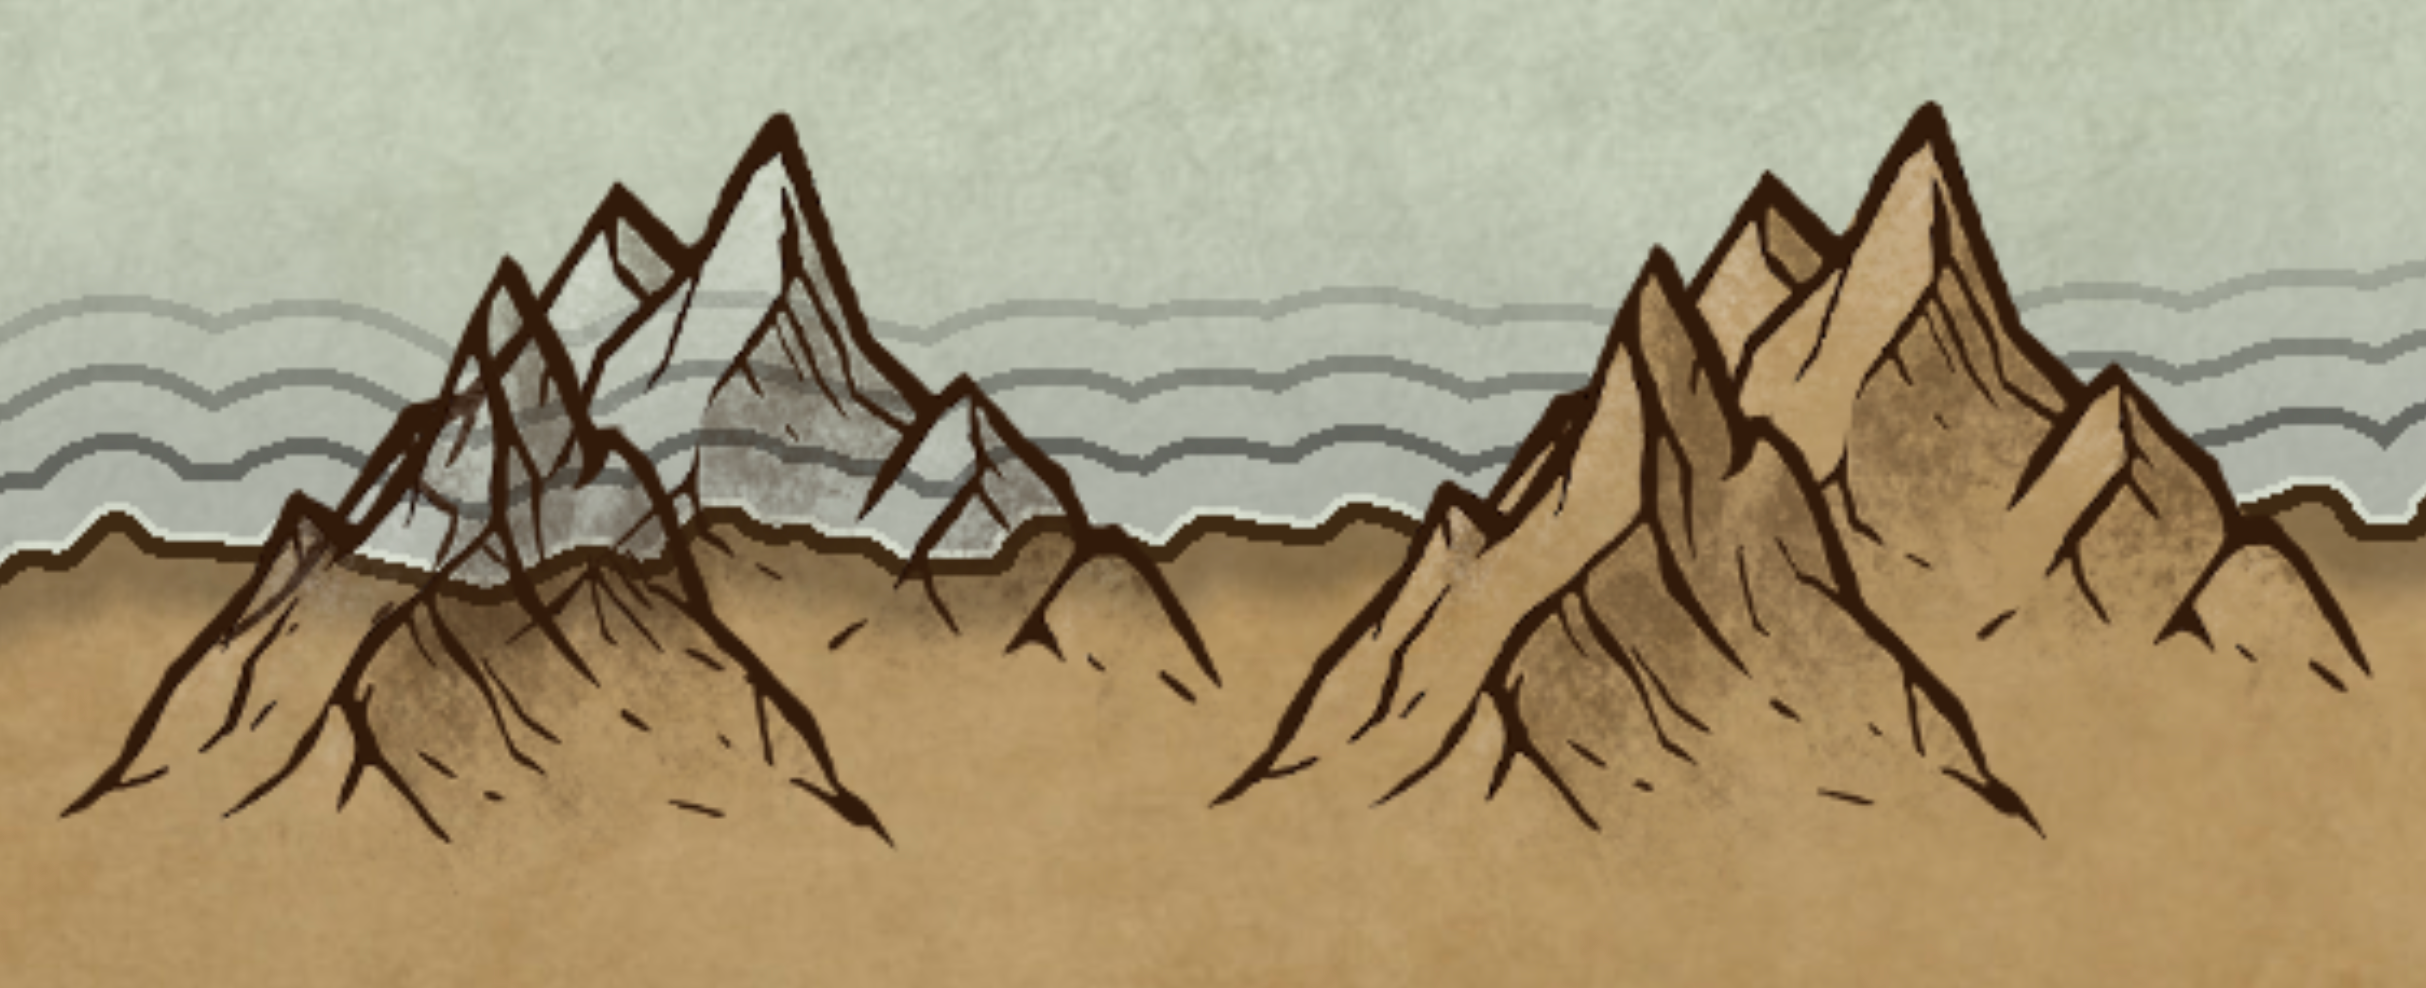
When an asset overlaps both land and water, the Clip Mask displays the terrain texture from beneath the land instead of the surrounding water. This allows mountains, cliffs, and other assets to extend naturally across the coastline without water appearing inside the asset.
This creates smooth transitions between land and water and prevents unwanted water from showing through the interior of clip-masked assets.
Coloring Assets
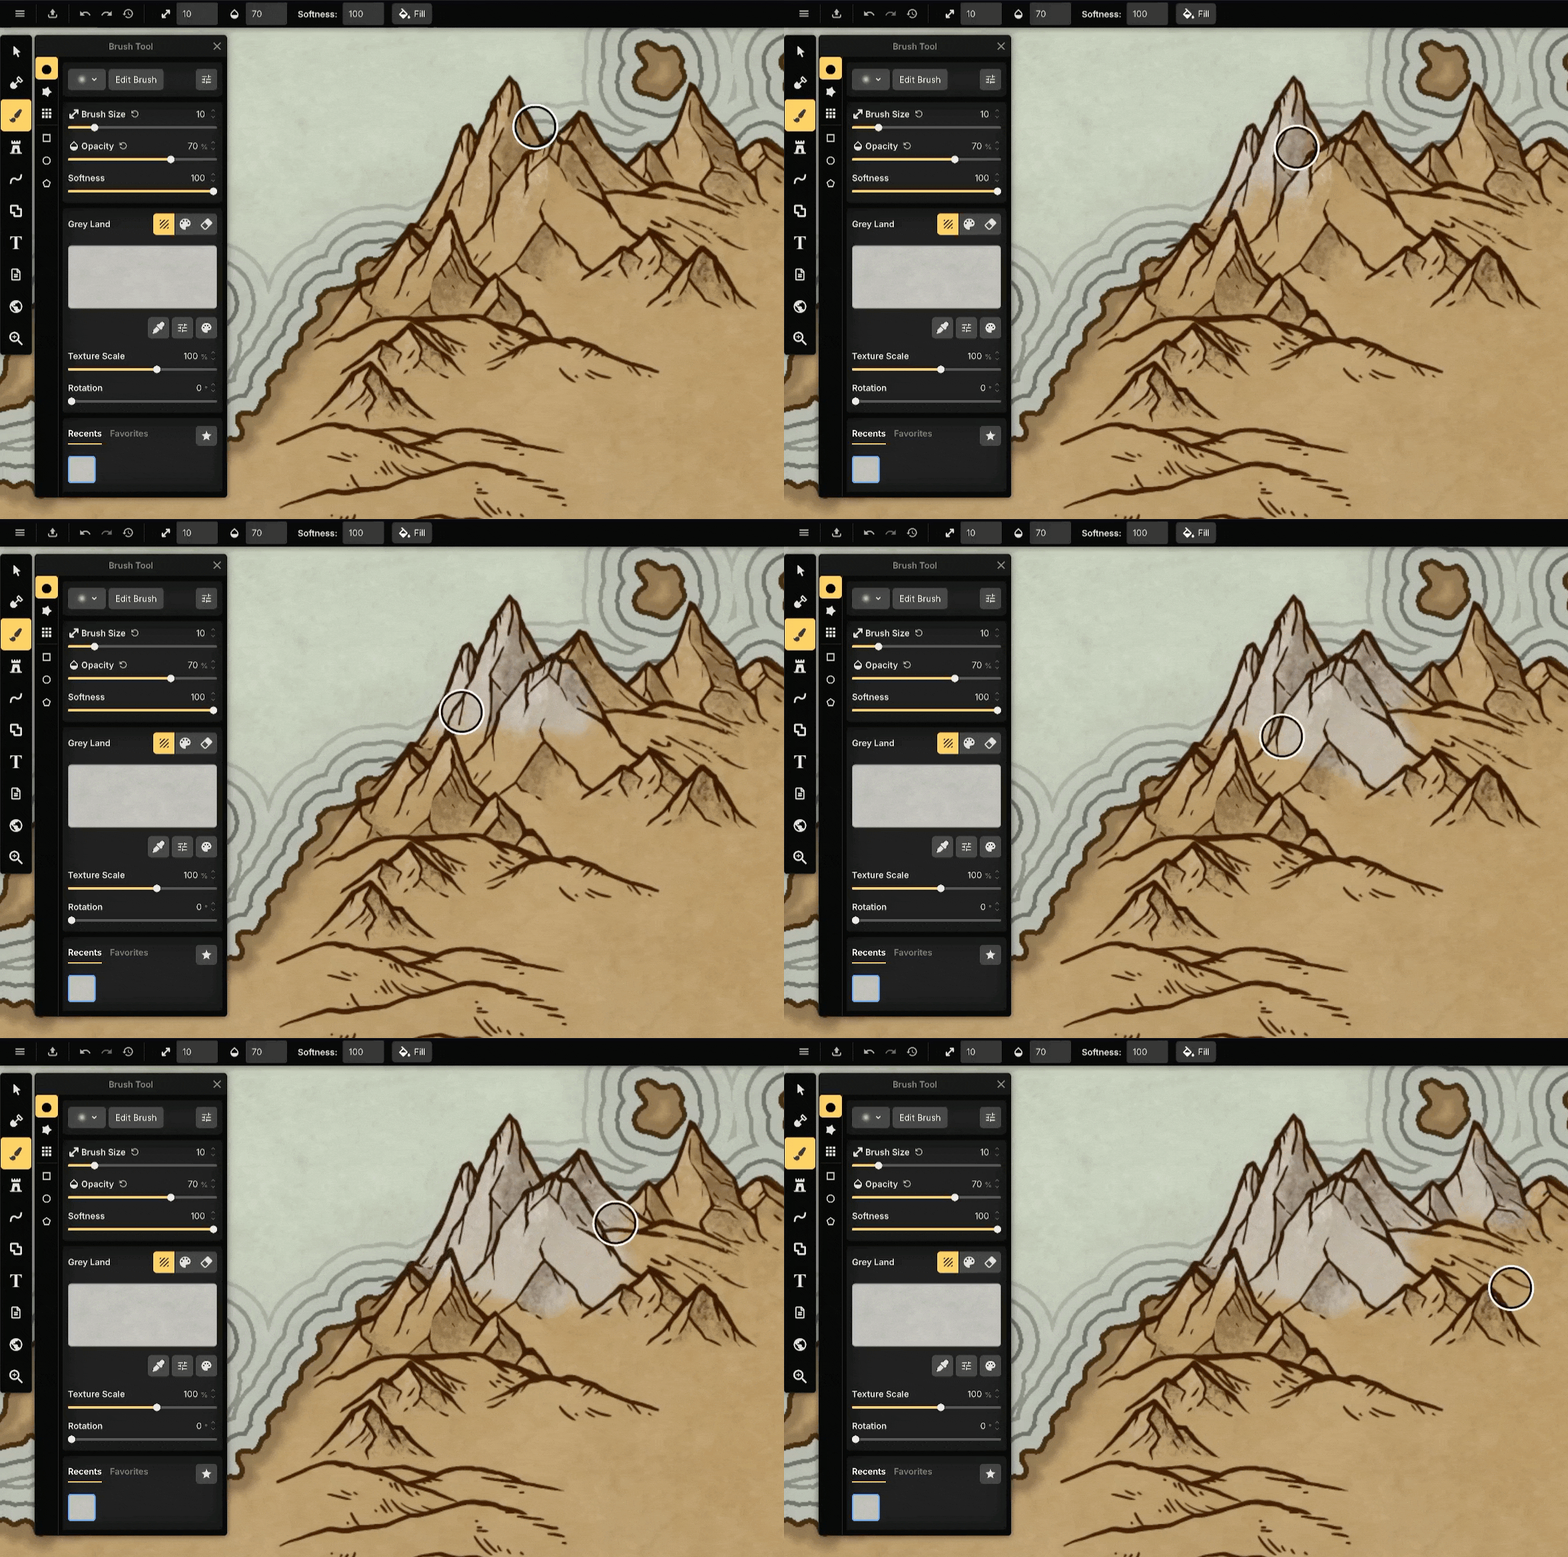
Because Clip Masks display the underlying Brush Layer, painting the brush layer also changes the appearance of clipped areas. This makes it possible to re-color many assets simply by painting the terrain beneath them.
Overlapping Objects
Many clip-masked assets have transparent areas in the asset itself. Without Clip Masks, overlapping assets would reveal the objects beneath them.
Instead, each asset displays the underlying terrain texture within its clipped areas, preventing unwanted transparency where assets overlap.
Limitations
Clip Masks only display textures from the nearest Brush Layer beneath the current Object Layer.
If no suitable Brush Layer exists, or the layer order changes, the clipped areas may not display the expected texture.
Tips
Use Clip Masks to help objects blend naturally into different terrain types without creating multiple versions of the same asset.
Paint the underlying Brush Layer to quickly change the appearance of clipped areas.
Keep Brush Layers directly beneath Object Layers when using Clip Masks to achieve the expected result.
Clip Masks work best with terrain textures that match the surrounding environment.
See Also
Brush Layers: Store the terrain textures used by Clip Masks.
Object Layers: Organize line, shape, stamp, and text objects while controlling shared layer settings and rendering order.
Brush Tool: Paint textures and colors onto Brush Layers.
Stamp Tool: Place and customize assets on your map.
Line & Shape Tools: Create node based objects with clip strokes and fills.
Was this helpful?
Still need help? Ask the team